
This guide walks you through powering and wiring the ANC-100e, setting up your PC’s network adapter, logging in to the web interface and going online with RSLinx Classic. It also covers the HMI feature for PanelView Plus, firmware upgrades and factory reset.
What the ANC-100e Does
The ANC-100e connects an Ethernet network to a Data Highway Plus (DH+) network, so PCs, SCADA servers and PanelView Plus terminals on Ethernet can communicate with Allen-Bradley PLC-5 and SLC 5/04 processors on DH+. It works with RSLinx Classic, FactoryTalk Linx, Ignition, Kepware, Wonderware and other EtherNet/IP software.
- 10/100 Mbps Ethernet and DH+ at 57.6, 115.2 and 230.4 kbps, with the DH+ speed detected automatically.
- Automatic polarity detection and automatic DH+ node assignment, so in most cases no DH+ configuration is needed.
- Two ways to connect to DH+: the 3-pin Phoenix connector for the blue hose, or the included 8-pin mini-DIN cable to the processor’s programming port.
- 9–24 V DC power, DIN-rail or flat mounting, with reverse-polarity and surge (TVS) protection.
- HMI feature that gives up to 5 DH+ nodes their own IP address, for PanelView Plus and other devices that can’t use DH+ addresses.
Performance tip: DH+ is a token-passing network, so every extra DH+ node and Ethernet client adds wait time. For time-sensitive applications, plan on no more than 1 EtherNet/IP device and 4 DH+ devices per ANC-100e.
Step 1: Power and Wire the ANC-100e
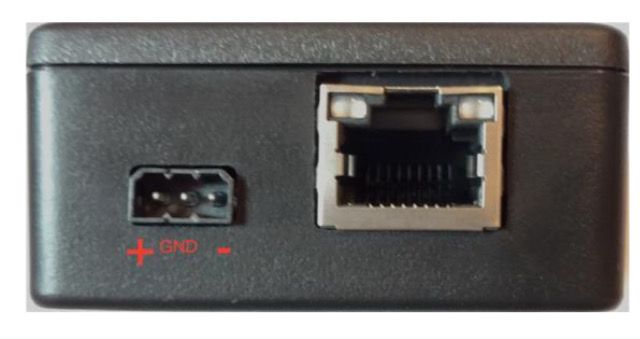
- Connect a 9–24 V DC supply to the power connector: + and – as marked on the case. The GND terminal is usually not needed, but can help protect against large power spikes. Current draw is about 35 mA at 24 V (94 mA at 9 V).
- Connect the DH+ cable to the two outer terminals of the 3-pin Phoenix connector and leave the middle pin unconnected. Blue/clear polarity doesn’t matter: the ANC-100e detects it on startup. Or use the 8-pin mini-DIN cable to the processor’s DH+ programming port.
- Connect the ANC-100e to your Ethernet switch or directly to your PC’s Ethernet port.
- The Ethernet LED blinks briefly, and the Diag LED turns solid green once the ANC-100e has joined the DH+ network.
Step 2: Configure Your PC’s Network Adapter
The ANC-100e ships with IP address 192.168.0.230 (mask 255.255.255.0). To reach its web interface the first time, your PC needs a static address on the same network. If your network already uses 192.168.0.x and that address is free, you can skip this step.
- Open Control Panel → Network and Internet → Network and Sharing Center → Change adapter settings.
- Right-click the Ethernet adapter connected to the ANC-100e and choose Properties.
- Select Internet Protocol Version 4 (TCP/IPv4) and click Properties.
- Choose Use the following IP address and enter IP address 192.168.0.1 and subnet mask 255.255.255.0. Leave the DNS fields blank.
- Click OK twice.
Step 3: Log In to the Web Interface
Open a web browser and go to 192.168.0.230 (or the address you assigned). The default username is admin and the default password is password.
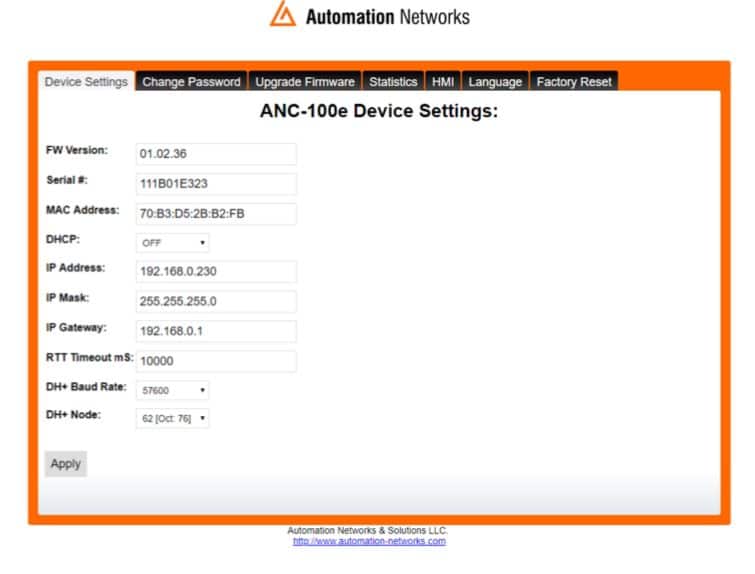
- Device Settings: shows the firmware version and serial number, and lets you set DHCP, IP address, mask and gateway, the DH+ baud rate and the DH+ node. Both DH+ settings default to Auto.
- To change a setting, select the new value and click Apply. The device reboots automatically. The IP address and mask must match your plant network.
- Change Password: enter the current password and the new one twice, then click Apply. We strongly recommend changing the default password.
- Statistics: real-time health data for the device and the DH+ network, including the status of the DH+ nodes.
- Language: English or Spanish. No reboot required.
Step 4: Go Online with RSLinx Classic
The ANC-100e emulates a ControlLogix Ethernet-to-DH+ bridge (1756-ENBT / 1756-DHRIO), so it works with RSLinx’s standard Ethernet drivers. No proprietary driver is needed.
- In RSLinx Classic, go to Communications → Configure Drivers.
- Add an Ethernet devices (AB_ETH) driver and enter the ANC-100e’s IP address in the station list, or add an EtherNet/IP (AB_ETHIP) driver to browse the local subnet.
- Check that the driver status is Running, then close the window.
- Open RSWho, expand the driver and then the ANC-100e until you reach its DH+ channel. Every device on the DH+ network appears there, ready for RSLogix 5 or RSLogix 500.
For FactoryTalk Linx and FactoryTalk View SE, see our RSLinx Classic and FactoryTalk Linx guide. For SCADA software, see the guides for Ignition, Kepware and Wonderware.
LED Indicators
| LED | What it means |
|---|---|
| Ethernet | Blinks when packets are exchanged with the PC or Ethernet network. |
| Diag solid red | Not associated with a DH+ network. |
| Diag solid green | Associated with the DH+ network. |
| DH+ off | No application traffic. |
| DH+ blinking green / yellow | Communicating with other DH+ nodes (yellow = transmit, green = receive). |
HMI Feature: Connect a PanelView Plus to DH+
Some devices, such as a PanelView Plus, can’t use DH+ addresses. The HMI tab lets you assign an unused IP address (on the same network as the ANC-100e) to a specific DH+ node, for up to 5 nodes. The ANC-100e forwards everything sent to that IP address to the DH+ node.
- Turn on a row in the HMI tab.
- Enter an unused IP address and the DH+ node of the processor (use 00 for node 0).
- Repeat for each processor, click Apply and wait about 5 seconds for the unit to reboot.
- In the PanelView configuration, add the processor from the Ethernet SLC devices or Ethernet PLC devices folder, using the IP address from the HMI tab.
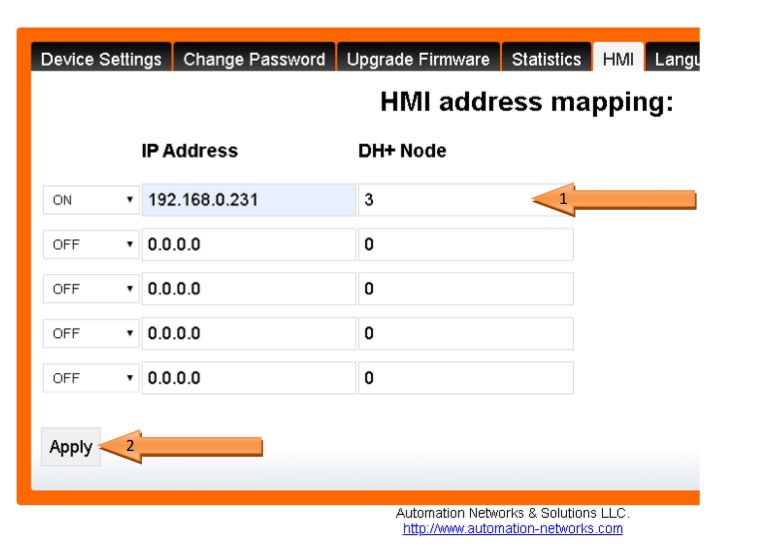
Example: ANC-100e at 192.168.0.230, SLC 5/04 on DH+ node 3 mapped to 192.168.0.231, PanelView Plus at 192.168.0.229. More detail in our PanelView Plus on DH+ guide.
Firmware Upgrade
Only upgrade with a firmware file provided by Automation Networks support, and only when necessary. Unplug the DH+ cable before you start. Your settings are kept after the upgrade.
- Log in to the web interface, open the Upgrade Firmware tab and click Upgrade. Wait 5 seconds and click OK.
- The device enters upgrade mode. Enter your current password and click Erase to remove the current firmware (required), then click Return. Don’t use the browser’s Back button.
- Click Browse, select the new firmware file and click Upload.
- When the confirmation page appears, wait 10 seconds and click Return to go back to the configuration interface.
Reset to Factory Defaults
- Power on the ANC-100e and wait about 5 seconds.
- With a paper clip, press and hold the reset button in the small hole below the DH+ LED.
- Release it when all three LEDs light up. The device reboots with its factory settings.
| Setting | Factory default |
|---|---|
| IP address | 192.168.0.230 |
| Network mask | 255.255.255.0 |
| Default gateway | 192.168.0.1 |
| DHCP | Off |
| DH+ node | Auto |
| DH+ speed | Auto |
| Interface language | English |
| Username / password | admin / password |
Full technical specifications are on the ANC-100e product page. Still need help? Contact our engineers.
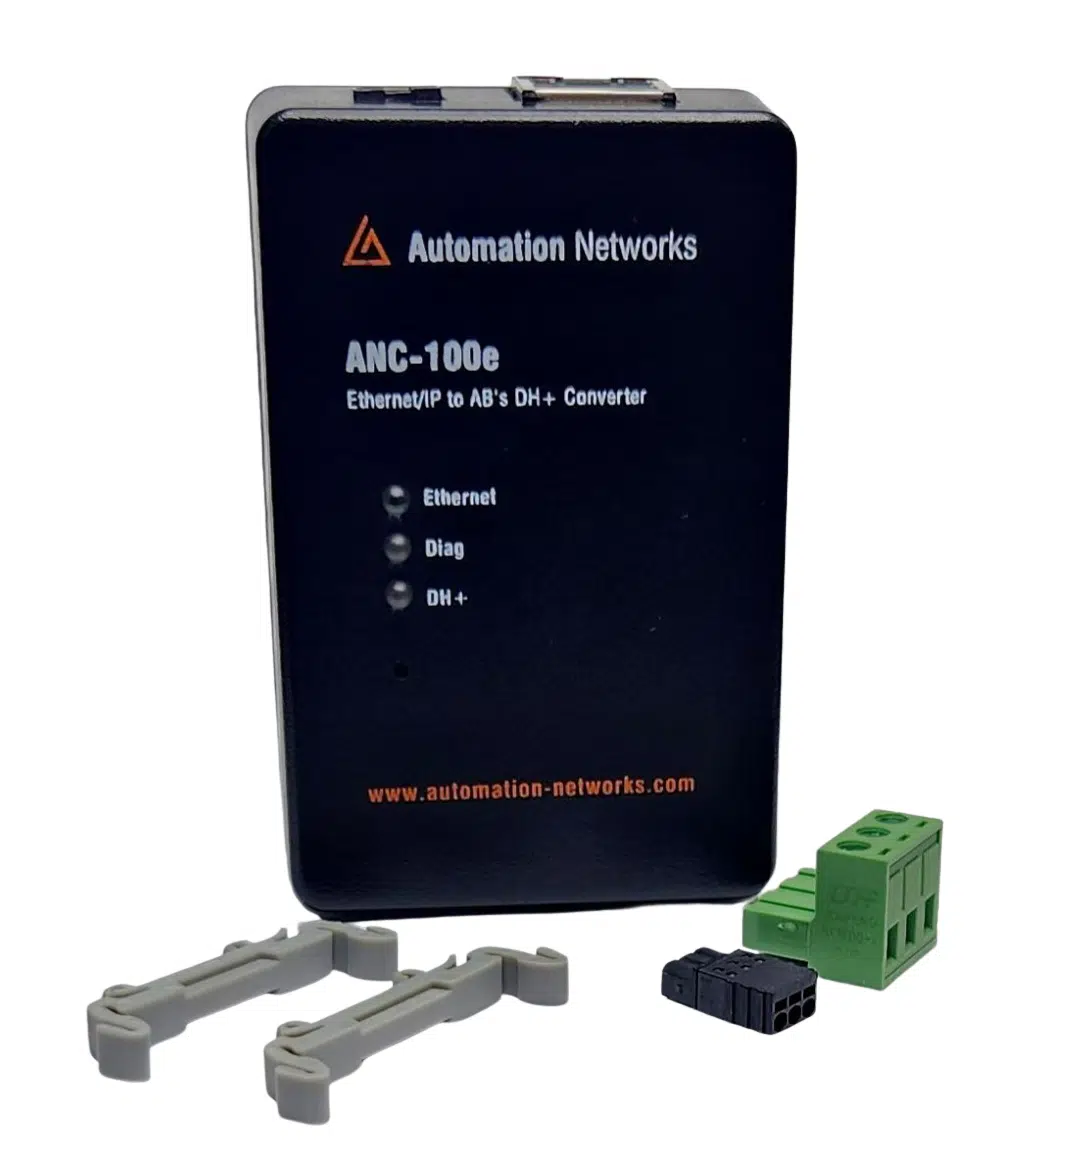
DIN-rail gateway for permanent SCADA, HMI, and PanelView Plus integration to legacy DH+ PLCs.
- • Standalone DH+ gateway architecture
- • Ignition, Kepware & FactoryTalk compatible
- • Lifetime Warranty & 30-day money-back satisfaction guarantee
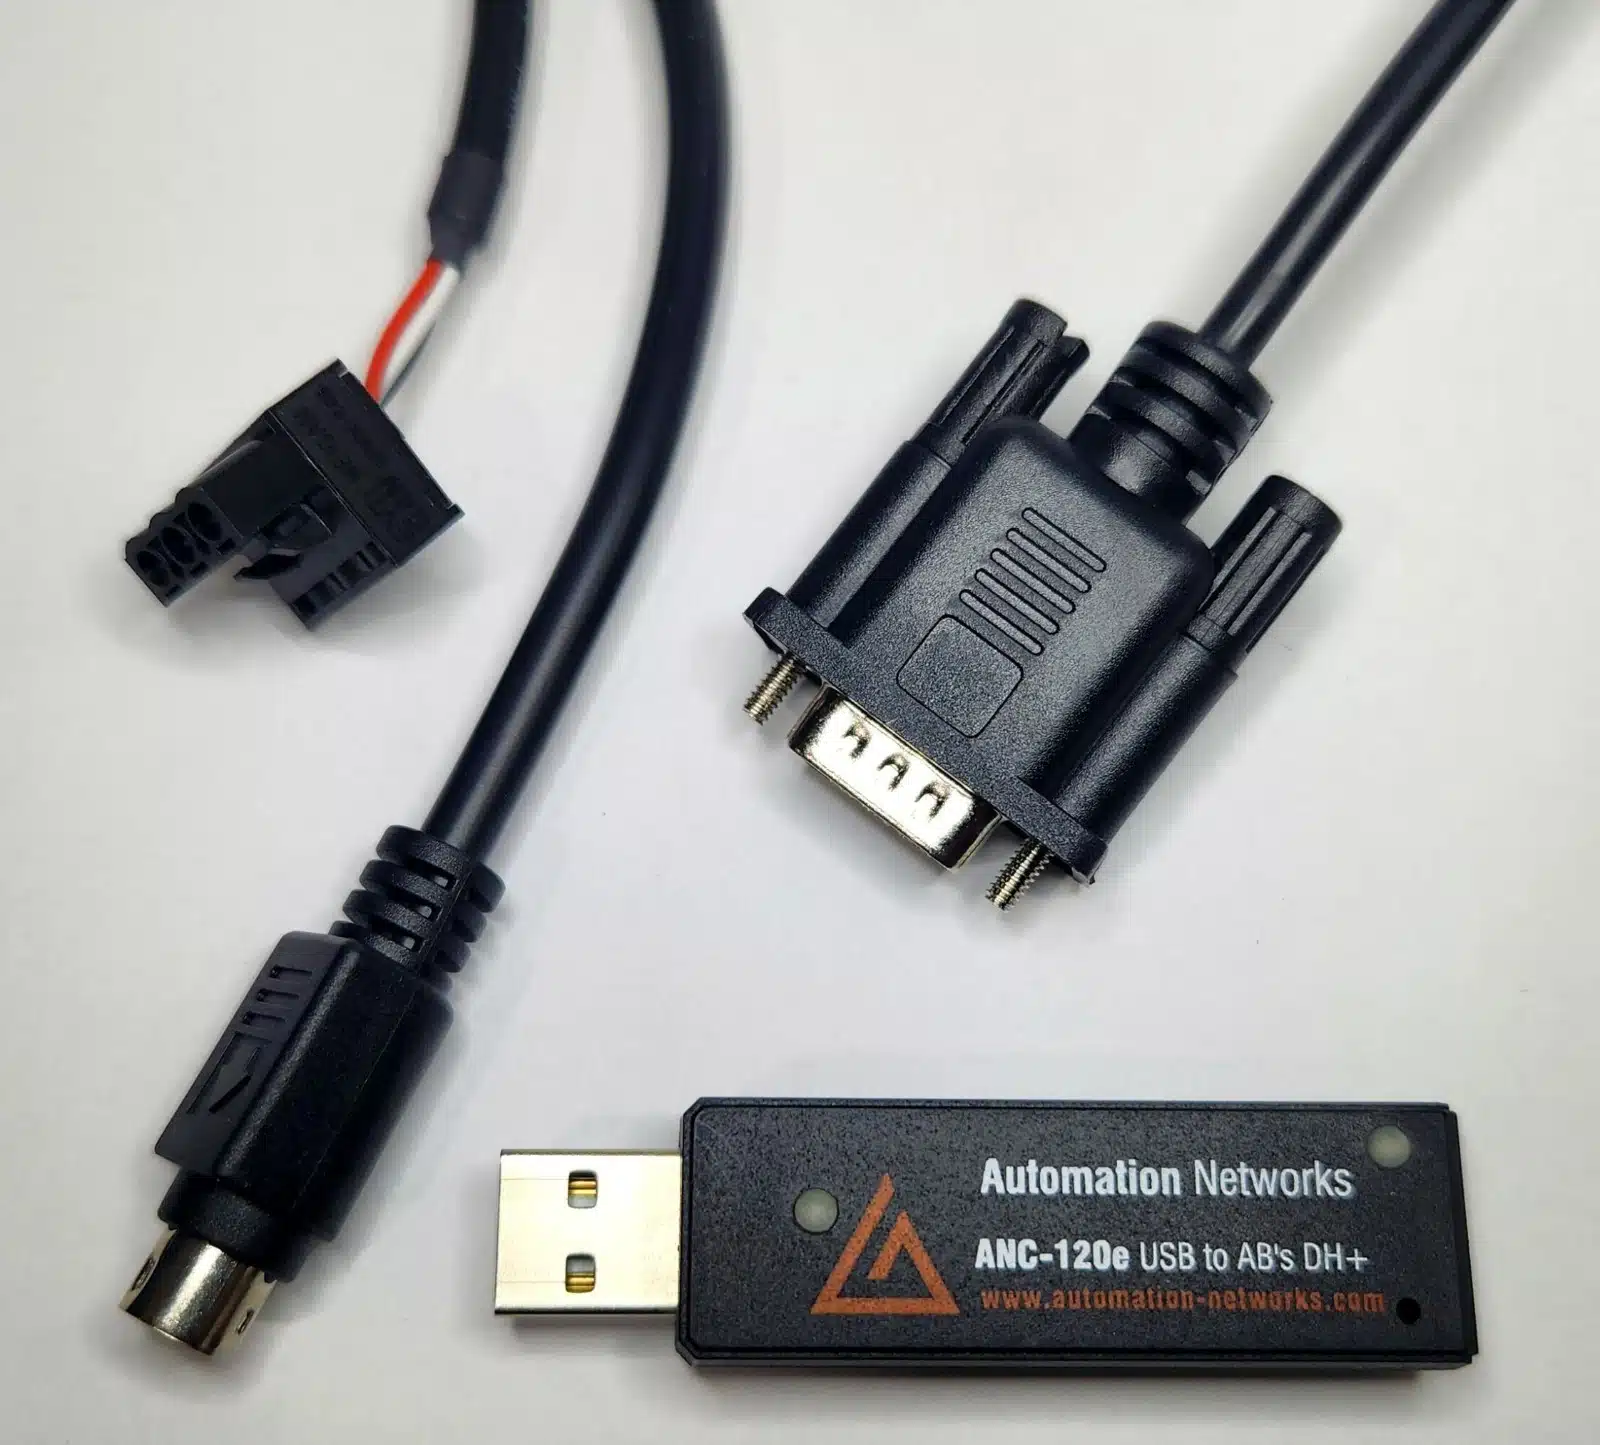
Field-proven 1784-U2DHP alternative. Connect your laptop to PLC-5 and SLC 5/04 controllers via USB on Windows 10 & 11.
- • Windows 10 & 11 (64-bit) native support
- • Cost-effective 1784-U2DHP alternative
- • Auto Baud & Auto Polarity detection